Skip to content

Get 20% off on Wallpapers, Prints, Frames*, and Accessories with the code: DECOR20

Cart

Pre-Pasted Wallpaper

Our pre-pasted wallpaper is a durable and easy decor solution. Printed on high-quality paper, these PVC-free wall coverings are built to stand the test of time. Their pre-pasted adhesive technology requires no wallpaper glue and can be installed in a few simple steps. Unlike traditional wallpaper, ours can easily be removed once you’re ready to switch to a new style!

Step 1:  Gather your tools

Before you begin beautifying your wall, make sure you have the following items handy:

  • Wallpaper tray larger than 24 in
  • Level & straightedge
  • Sponge & bucket
  • Clean cloth
  • Measuring tape
  • Sharp scissors
  • Drop cloth
  • Lead pencil
  • Craft knife 
  • Step ladder (depending on the height of your wall)

*If you can, we recommend asking a friend for some assistance!

Pre-pasted wallpaper tools

Step 2: Prep your wall

Wallpaper works best on dry, smooth and clean walls. Before you get started, make sure to fill in any holes and sand down bumps. Electrical coverings and pre-existing wallpaper should also be removed. If your wall happens to have an uneven texture, you’ll need to cover it with wallpaper liner. Wallpaper primer makes installation and removal easier, and is recommended, particularly if you require the use of a wallpaper liner. Lastly, clean the wall surface with a damp sponge or cloth to remove any remaining dust or plaster. Let dry before moving on to the next step.


Step 3: Mark your starting point

All of our pre-pasted rolls are 24 inches wide. Starting from the corner of the wall, measure the width of the wallpaper minus one inch (to allow for trimming on the wall edge) and mark with a pencil. Using a level, draw a straight, vertical line from the mark against which you can line up the edge of the wallpaper. 


Step 4: Wet your wallpaper

Loosely roll the first strip with the patterned side facing in. Completely submerge the rolled wallpaper in water. We recommend using a wallpaper tray. Let the wallpaper sit in the water for a minimum of 15 seconds to activate the adhesive. Remove the roll by gently pulling the outer edge out of the tray, glue-side up. Make sure to soak & book (see next step) each strip for the same amount of time as a varied exposure to water could make the product expand slightly, resulting in an uneven pattern. 


Step 5: Book the wallpaper

"Book" the wallpaper by laying it on the floor glue-side up. Next, fold it against the glue side against itself (as pictured). Let sit for approximately 1 minute. Be careful not to crease the paper while folding it. 


Step 6: Place the first strip

Unfold the top half of the wallpaper, leaving the bottom half of the wallpaper booked. Place the glue-exposed portion of the top of the wallpaper on the wall. Line up the strip with the previously drawn pencil line, allowing for an inch on both the top, bottom, and edge for trimming.


Step 7: Apply & smooth

Once you're happy with the initial positioning, unfold the wallpaper to expose the remaining glued surface. Using a damp sponge, smooth downward and outward. Flatten the strips using the sponge. Don’t worry about bubbles smaller than a quarter as they will disappear once the wallpaper sets. 


Step 8: Apply the remaining strips

Align the next wallpaper strip, making sure to match the pattern pinpoints. Smooth out all air bubbles. Wipe with warm water and a sponge, removing all the paste from the surface. Rinse thoroughly a second time with clean warm water. Soak, book and repeat for the remaining strips!


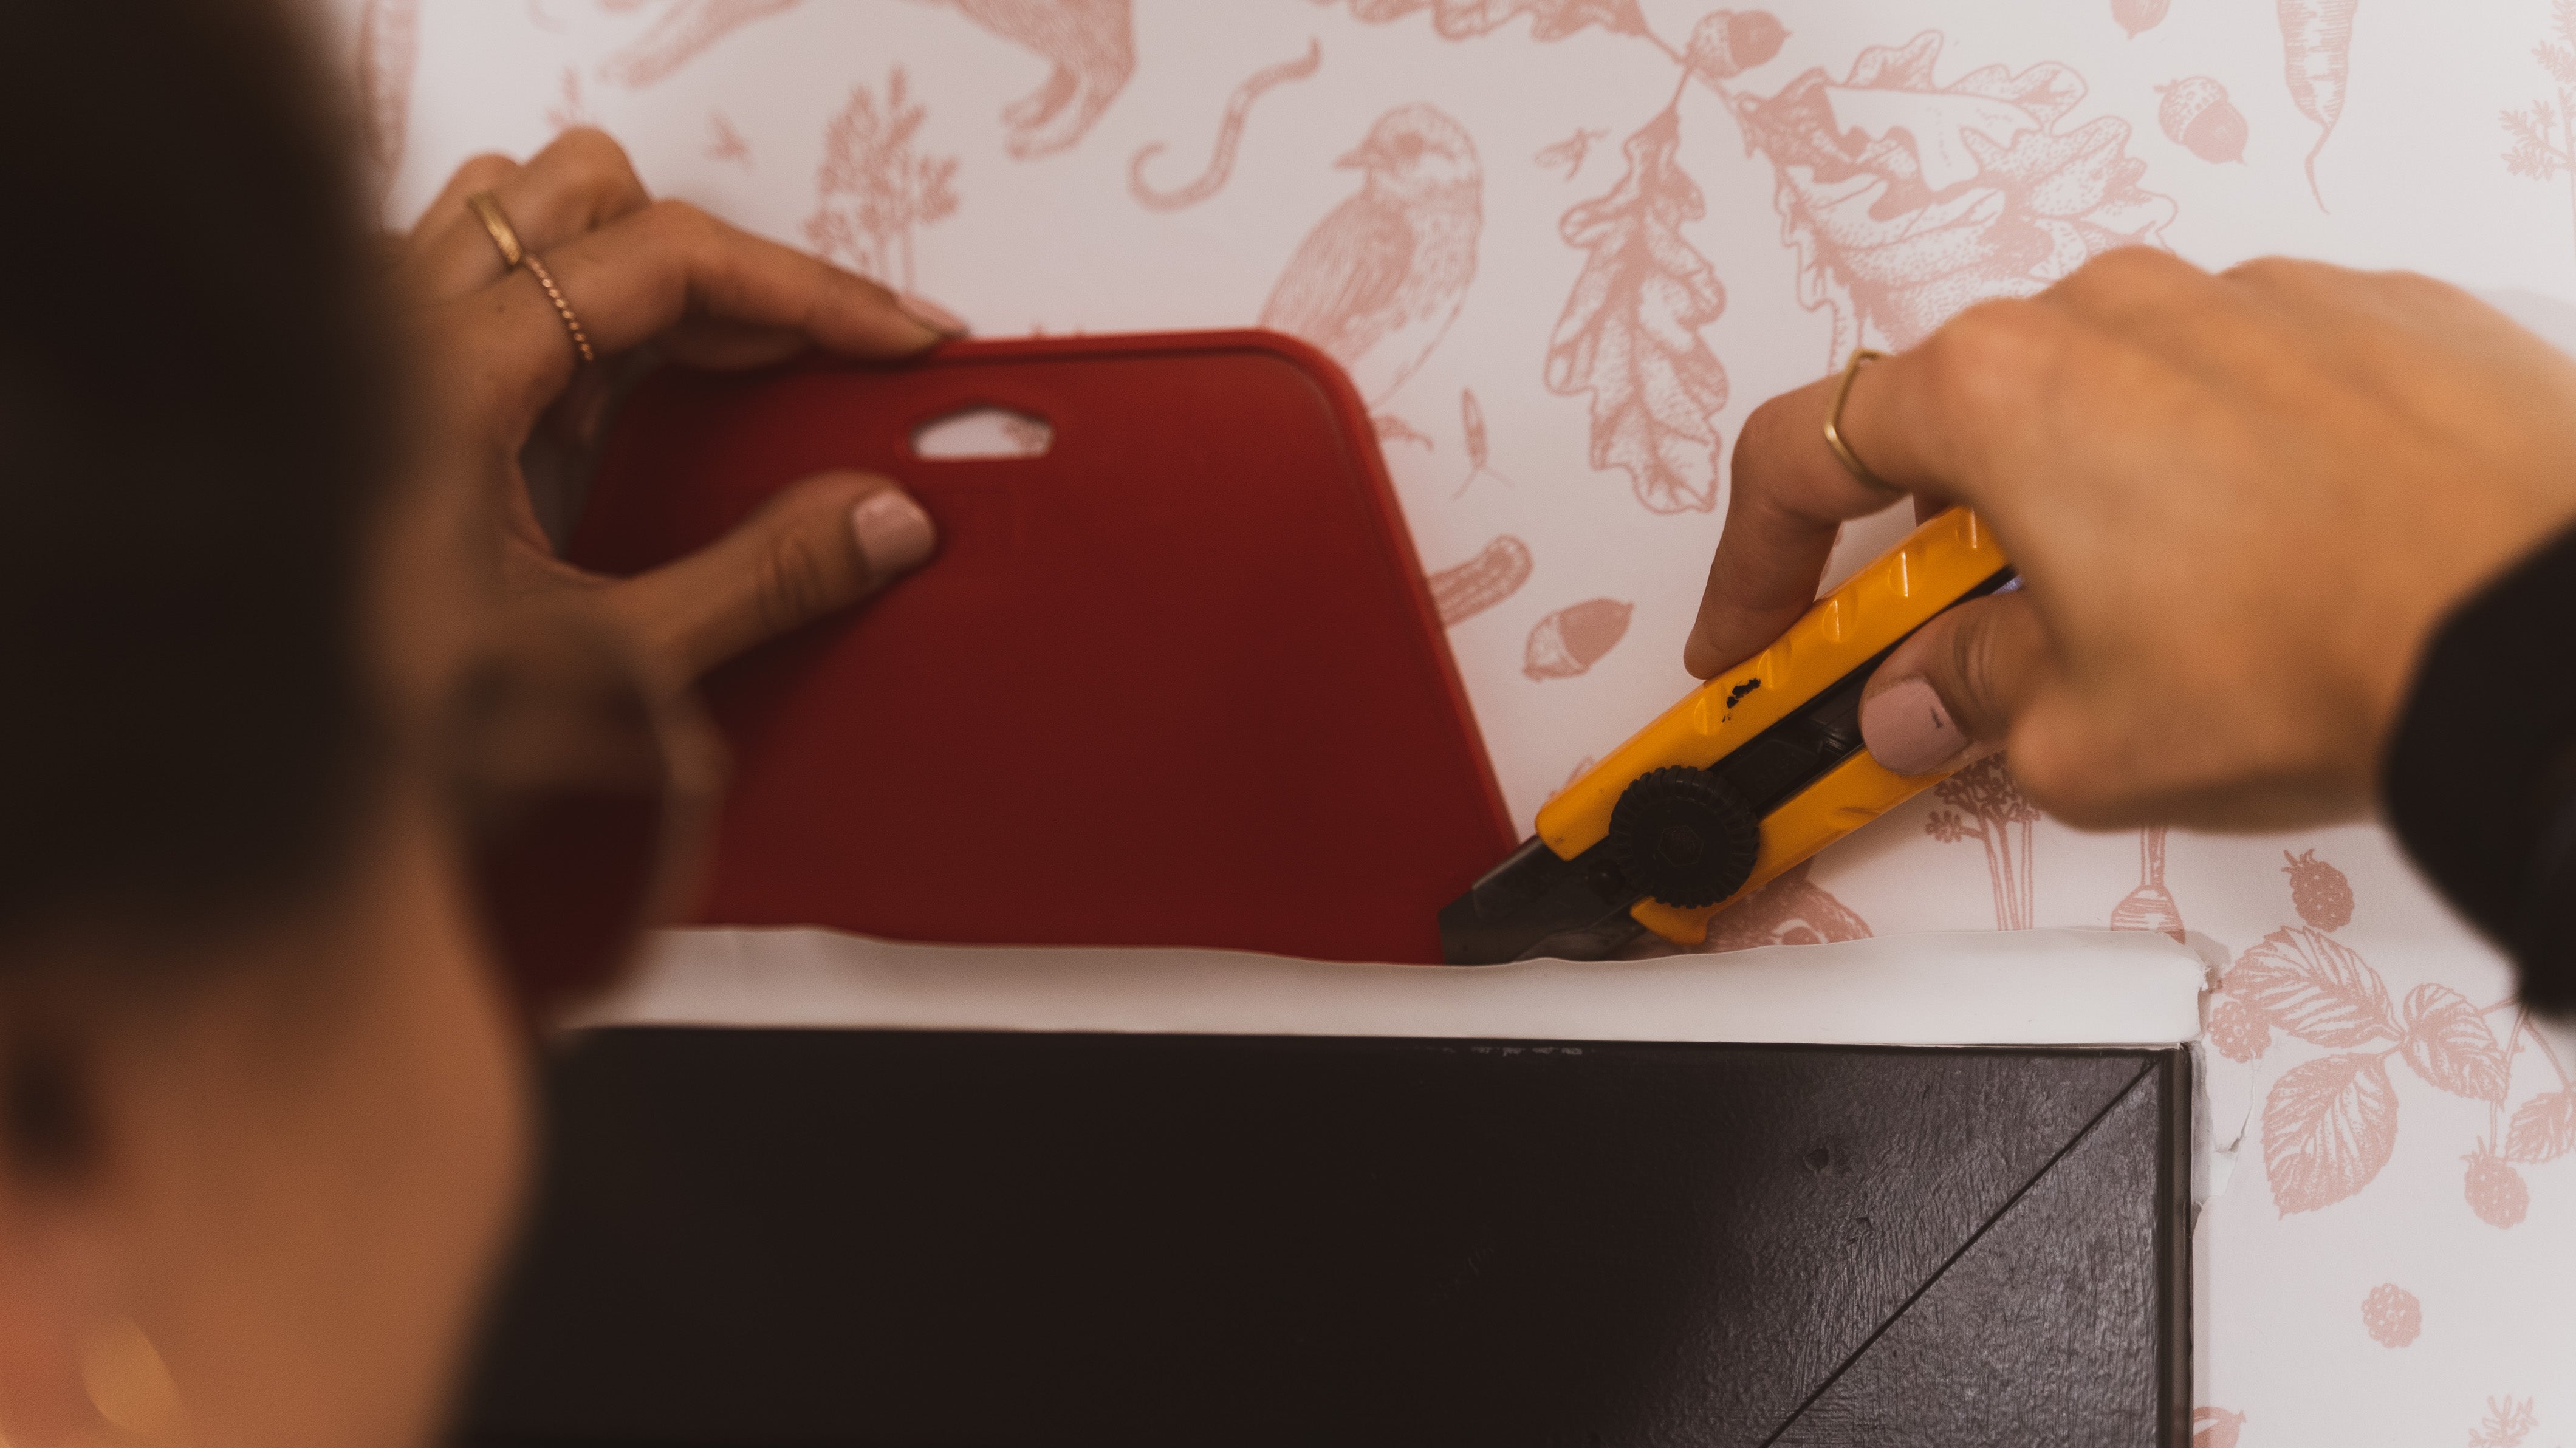
Step 9: Trim the edges

Let the wallpaper dry and harden for a few minutes to avoid ripping or creasing the wallpaper. Using a straightedge and craft (or exacto) knife, carefully trim the edges. Change your blade frequently to ensure a sharp cut and minimize risks of tearing the paper. Careful, if your wall isn’t well prepped and primed, this step may cause a slight ripping of your paint. 

FAQ

Does the wallpaper hide imperfections?

While our wallpaper may conceal stains and tiny bumps, it won't hide textured imperfections such as screw holes or paint drips. We recommend covering holes and sanding down bumps before applying your wallpaper as these imperfections will be visible through the wallpaper.

How can I place the wallpaper around corners and moldings?

Check out our instructions for the Peel & Stick and the Pre-Pasted wallpapers.

How do I go about installing your wallpaper?

Check out our instructions for the Peel & Stick and the Pre-Pasted wallpapers.

Do you sell single rolls or double rolls?

Our rolls are single rolls. This format makes installation easier and creates less waste.

Do you factor in windows and doors into your quantity calculations?

In order to avoid mistakes and ensure continuity in the pattern, it is important to factor in windows and doors. You'll want to measure the entire surface of the wall and have enough wallpaper rolls to cover the full area. You could repurpose any leftover wallpaper by framing it or using it to spruce up old furniture!

How many wallpaper rolls should I order?

You'll find our practical "Wallpaper Calculator" on the wallpaper product page. This tool allows you to enter your wall measurements (height and length) and gives you the amount and length of rolls needed to cover the desired surface. The calculator will always round up the number of rolls to allow an error margin.

Can I install your wallpaper in my bathroom?

The peel & stick wallpaper can be installed in a bathroom as long as it is not in direct contact with water and is in a well-ventilated room. When applying wallpaper to a more humid space such as a bathroom, laundry room, or kitchen, it is particularly important to prep your wall according to the instructions as this will increase the adherence of your wallpaper to the wall.

What is a pre-pasted wallpaper?

Our pre-pasted wallpaper is reminiscent of traditional wallpaper... Except it’s more convenient! As the name suggests, a layer of glue has previously been applied to its backing. Simply submerge it in water to activate the paste and beautify your wall.

· 175 gr mat paper

· Odour-free - PVC-free

· Printed with HP Latex Ink (water and latex, evaporation of water which makes it cure without the use of chemicals)

· Flame resistant

· Mold and mildew resistant

· 100% recyclable

What is a peel and stick wallpaper?

Our peel & stick wallpaper instantly takes your walls from boring to beautiful! This is a fabulous option for rented spaces and kids’ rooms as it can easily be removed without any damages to your wall (as long as it’s been properly primed). Peel & stick wallpaper is also water-resistant, making it the perfect fit for bathroom and kitchen makeovers!

· Polyester 350 gr

· PVC-free

· Printed with HP Latex Ink (water and latex, evaporation of water which makes it cure without the use of chemicals)

· Water-resistant - Washable

· May be mounted to any surface

· Can be repositioned several times

Which type of sample should I order?

It is important to note that the colour and pattern of a wallpaper design will have a slightly different look and finish whether it is printed on a pre-pasted or peel & stick. For this reason, it's important to order a sample in the wallpaper type you plan on applying to your wall. If you're unsure about which wallpaper type you want, we recommend ordering one sample of each to compare the look and finish.

Why should I order a sample?

Although we make sure all of the images on our website accurately represent the colours of the product, we cannot be responsible for the colour variations that may occur when viewed on your device's screen. In addition to this, a wallpaper's colour will look different in every environment, depending on the lighting, other colours in the room, etc. The samples are the best way to see how different wallpapers will look in your home.